Chicken Samosa

Assalamo Alaikum,

I wanted to share this post that i make me quite excited with my fellow readers,

“As we enter the month of Rajab, we are reminded of the need to prepare for the blessed month of Ramadan.

“The month of Rajab is the month of planting, Sh’aban the month of watering and Ramadan the month of harvesting.”

“The month of Rajab is like the wind, Sh’aban is like the rain clouds and Ramadan is like the rain”

This is a beautiful reminder. We cannot expect to harvest in Ramadan if we fail to plant the seeds of goodness in Rajab and nurture the goodness in Sh’aban.

O Allah, bless us with the ability to work righteous deeds in this month and the next. Help us reach Ramadan in a state that we are ready to harvest.

(Abu Bakr Muhammad bin ‘Omar al-Warraq al-Balkhi al-Hakim (d.243 AH), quoted by Ibn Rajab al-Hanbali (d.795 AH) in his book regarding the virtues of the different months and the deeds one should strive to carry out in them; Lataif al-Ma’arif)” 

Ramadan is coming oh!! i cannot wait for Ramadan,MashAllah this month somehow puts a magical spell on me for example  the stuff i struggle to do during rest of the year Ramadan makes it easy on me my spiritual energy becomes amazing ,this Ramadan I’m praying that  i have the same energy all year long in Sha Allah:).So i’m starting early as above quote states and in sha Allah with the help of Allah Subhana wa tallah!!

Food is an important part of Pakistani family and every occasion has its own special dishes like samosas if i make samosa other then Ramadan everybody would say it feels like Ramadan,
Ramadan is incomplete without Samosas. I’m sharing my tasty chicken samosas which i usually make ahead of Ramadan in large quantities (as i can be easily frozen ),so i have to spend less time cooking and more time praying in sha Allah.

Chicken Samosa

Recipe

Ingredients:

Dough:

All purpose flour  2 cups

salt 1 tsp or to taste

oil or ghee     4 tbsp

water enough to make a semi soft dough

Filling:

Chicken Qeema  1 pd

Onion sliced one medium

Oil 2 tbsp

Ginger paste  1 tsp

Garlic paste   1 tsp

Chili powder  1 tsp

Turmeric powder 1/4 tsp

Salt to  taste 

Cumin seeds   1/2 tsp

Frying:

Oil        2-3 cups

Direction:

Mix Flour and salt together

then add oil and mix thoroughly

now add water little by little to form a semi soft dough (not very hard and not very soft)

leave to rest for at least 15 mins.

In a saute pan heat oil for filling and add sliced onion

fry until golden brown

Now add chicken qeema and then ginger and garlic paste ,

Add chilli powder , tumeric,salt and cumin seeds, cook on high until brown

Lost the picture of ready qeema 😦

Make golf ball size  balls from the dough and using rolling pin roll out the balls in  8 inch circle

Cut in the middle of the circle

Fold one side over like this

then apply water on the side and flip over the other side ,pinch it from top to bottom so it sticks

hold it in your hand like a cone

add about 2 tbsp of filling and apple water on top edges of the samosa

press together the mouth of samosa to close it so it wont open up while frying, at this point you can place the samosas on a flour tray and freeze until hard ,then place them in zip-lock bag and defrost and fry as many as you want ( you can freeze samosas in layers on a tray by using wax paper or plastic bag in between)

 Heat oil in a deep wok or Karahi on medium high heat and then fry samosas on medium low until golden brown

strain them out in big strianer to remove excess oil

Serve hot with delicious green chutney and enjoy!!

Homemade Rondo’s(Avid Bakers Challenge January 2016)

Assalamo-Alaikum,

As you might now my oven  broke down it happened in August i believe and then after that my husband and me were debating about getting it repaired or getting a new one,obviously i wish for a new oven as the one we had has been there since like forever so my hubby agreed and right now we are hunting for good deals , wish us luck so we could get the one we want in sha Allah!!!

In the mean time my baking has been jeopardized and I’ have missed baking so much,i feel that baking is kind of a therapy which ends up in some added fat on your body usually right lol,do you guys agree with me or not?So i decided i’m going to use my toaster oven for whatever i can fit and bake in there,like i have roasted a chicken in there yes i did it ,i thought it was not possible but yes Alhamdulilah bit time consuming but results were good!!

Enough of my rant lets get to our Avid Baker’s challenge here,today we are making “Rondo’s”which are

“Everybody in Holland knows these cakes. We actually call it a ‘koek’ because to us it is more or less the big brother of a ‘koekje’ (a cookie or biscuit).” as per weekendbakery.com.

By the way this year Avid Bakers are using weekendbakery.com for wonderful recipes choosen by beloved  Hana from”Hana the baker and please do visit her andother bakers to see their hard work here!!

the recipe for is linked here

mixing butter and flour together in food processor

that how it looks after

combine it together to form a dough


Now making Frangipane paste ,we had two option for filling either this or Almond paste i went with frangipane!!

mixing lemon zest,egg and sugar

All the hardwork and this beautiful color!!

Now adding Almond meal (i know the color but i was goood)

spreading bottom of Rondo( it was hard dough to work with)

Now adding the paste which has been in the fridge for an hour

top cover I forgot the egg wash:(

the final look yummy ,sweet and crumbly goodness

The Daring Baker’s Challenge May 2015 "LAMINGTON"

Assalamo Alaikum,

I’m a big chocolate fan you can cover anything with chocolate an i’ll eat it but i think  its mostly sweetness of sugar that attracts me towards it because if chocolate is dark yeah i mean dark chocolate i wont touch it,as time is passing i’m getting older i have to pay attention to food going in my belly specially sugar as i’m genetically prone to diabetes so better be careful right, but today….is off day because for May challenge Marcellina from Marcellina in Cucina dared us to make Lamingtons, An Australian delicacy that is as tasty as it is elegant .

I really enjoyed making Lamingtons and also eating ..yeah yeah i know i only ate one piece 🙂 and my kids they loved it also i was kind of surprised because i thought they might not like it because of coconut but all four of them  loved it!!

As i said i enjoyed making them but few thing i would like to mention one is covering my pan with foil not a good idea i think butter paper or parchment paper would be best and another thing when i folded in the cornstarch mixture ,some dry cornstarch stayed on the bottom and when i was pouring the batter in the pan i could see it then i had to mix it in the pan so make sure the batter is completely mixed but do it light handed:)

I used the original recipe used by Marcellina right here!!

LAMINGTONS

Ingredients:

Sponge Cake

5 large eggs, at room temperature
1 cup  castor (superfine) sugar
Pinch salt
1 teaspoon  vanilla extract
1 ¼ cups  cornflour (cornstarch)
1 ½ teaspoons  baking powder
1 tablespoon  butter, melted (optional)

Chocolate Sauce

3 ¼ cups  icing (powdered) sugar
 1/3 cup  cocoa powder
1 tablespoon butter, melted
 ½ to ¾ cup milk

Desiccated coconut

Direction:
Pre Heat oven at 350F

Prepare a 9″ by 13″ and 1 3/4 inch deep pan with non stick paper

Beat eggs,sugar and salt with hand mixer or stand mixer  for 15mins on high speed

hand over the hand mixer to your husband like i did LOL and

sift cornstarch and baking powder three times

after fifteen minutes as vanilla extract to egg mixture and again beat for 5 mins on high

now add  sifted to add dry mixture to eggs

and fold it in completely but  very lightly with rubber spatula or wooden spatula

and pour this mixture in prepared pan and smooth it evenly on the top

Bake for 22-25 mins until cake it brown on top and bounces when touched

its better to let it rest over night ,so its easier to handle

cut the cake into 24 equal pieces

 Sift the icing sugar and cocoa into a heatproof bowl.

Stir in the butter and ½ cup milk.

 Set the bowl over a pan of hot water.

Stir until icing is smooth adding more milk to thin the icing if needed.

now for assembly keep chocolate sauce over hot water

place coconut in shallow dish

wire rack over a plate

place a piece of cake in chocolate sauce let excess drip off

now place the cake in coconut covering it all around

now put it on wire rack to set for about 2hrs (if you could wait)

and enjoy!!

Brown Butter Banana Bread (Avid Baker’s Challenge May 2015)

Assalamo-Alaikum,

Growing up I was not a big fan of eating bananas and when my mom use to tell me all the “good” benefit oh how angry I use to get oh my oh my, now I think I have passed some of my banana hating genes to two of my kids they wont eat banana on it own neither in any dishes so banana bread ,muffin and anything to do with banana is kind of no in m home. When I saw this Avid Baker’s challenge I was like ok but I already missed a challenge last month so I didn’t wanted to miss again so I went with it ,we will see ……..And one more thing I was really interested to to make brown which I haven’t made before so it was a bit of learning experience for me too(with lots of patience!!)I loved the aroma of brown butter and would surely try other recipes using it!!

As a reminder I’m a member of Avid Baker’s Challenge and this year we making the recipe from Scientifically Sweet by Christina Marsigliese and the recipe is chosen by our dear Admin Hannah from Hanaa the Baker!!As you already know recipe of choice is Brown Butter Banana Bread ,with some small changes to the recipe i.e right here and I used brown sugar instead of regular ,one banana instead of two(guess why??)and one cup chocolate chips instead of 3/4.

The best and most annoying process was making brown butter, I was like may be i’ll stand in front of stove like whole night but Alhamdulilah it went well!!

And by the way do visit other great blogs participating in this wonderful challenge here!!

February 2015 daring baker’s challenge (Siopao (Asian Filled Buns)


Assalamo-alaikum,

While i’m sitting here and typing my head is telling with such a cloudy and cold weather i need some warm and comforting snack, as a desi first thing comes to mind are Pakora but i could use some other  comfort snack food so i decided to go Filipino as this month the February daring bakers  challenge is hosted by Julie of One-wall kitchen ,she challenged us to an easy, simple filled bun using no knead-dough!!!

“Siopao literally means “steamed buns“. It is a famous Filipino-Chinese snack. It has also been incorporated into Thai cuisine as well where it is called salapao 
A popular food item in the Philippines and Thailandsiopao and salapao do not require utensils to eat and can be consumed on-the-go. Like bāozi, there are different varieties based on stuffing: Asado or bola-bola (which may use any kind of meat). There is also a baked variety.”
taken from wikipeadia
Today i’m making  baked Siopoa and I’m filling it with sweet and savory,for sweet I’m using Nutella and for savory some cubed cheddar cheese simple and easy.the outcome was soft and light buns but I think i made these too big next i’m surely making them a little smaller and for fillings sky is the limit!!


Siopao

source:the daring bakers

Recipe:
Ingredient:
2 tsp Yeast
1 1/2 cup warm water
2 tbsp melted butter
2 tbsp sugar
1 tsp salt
4 to 5 cups flour
1 beaten egg for egg wash
Direction:
Mix together warm water,yeast,melted butter,salt and sugar ,let it stand

Now add flour slowly  making a dough that is sticky but not wet

cover with damp cloth and let it rise for an hour

divide dough in twelve equal pieces and form a ball

spread the dough with hand or rolling pin to form a flat disc

 place 1 tsp full of the filling in my case Nutella 


or cubed cheddar cheese


place them on a foil or parchment paper lined cookie sheet


bake in a preheated for 350F 
cover again with damp cloth and let it rise for 30 mins

brush egg wash on the risen dough ball
 bake for twenty mins until golden brown on top 


serve warm  and enjoy!!


ORANGE,ALMOND AND DATE BISCOTTI (AVID BAKER’S CHALLENGE FEBRUARY 2015)

Assalamo-alaikum,

Today as I’m writing this post my excitement is at peek ,guess why? ok lets quit the guessing game and i’ll tell you , i have joined a group of “AVID” bakers that’s how exciting this group is .I recently sent an email to the admin i.e Hanaa @ Hanaathebaker, she responded to me very rapidly that she is happy to welcome me to the group of amazing bakers Yay:) and then when i joined the Facebook group page i got really warm  response from other members too.My post today is my first challenge as part of Avid Bakers , for February challenge it was kind of late as due date was long gone but Hanna and other members encouraged me to still do the post and share it on the group Facebook page here,i was like time to get in action!!!

As Avid baker you have to do certain challenges from a book or a blog selected by Hanaa the Admin ,this year we are doing the recipes from a blog Scientifically Sweet by Christina Marsigliese, she is an author of a cookbook too.And for other rules about the group you can go here and get all the information.

 For February our recipe of choice was “Orange,Almond and date biscotti” which i have never made before so..very exciting for me !!i used original recipe with some variations so please come on and make some  with me !!

For this recipe we needed some orange zest and i was really happy that i could use oranges sitting in my fruit basket right from dear garden!!

and yes do visit other members blog for their experiences with this recipe here!!

Orange ,Almond and Date Biscotti

ingredients:

2 cups Flour
2 tsp baking powder
1/4 tsp salt
1/2 cup oil
2 tbsp orange zest
2/3 cup brown sugar
1/3 cup granulated pure cane sugar
1 tsp vanilla extract
2/3 cup roughly chopped Almonds
1/ cup chopped dates

direction:

Pre heat oven to 350F and line baking sheet with foil

in a large bowl sift together flour,baking powder and salt,stir in the Almonds

whisk eggs and sugars until well mixed,then add in oil,orange zest,vanilla

now add flour mixture and mix well,now add dates to form a sticky dough

divide dough in half

 form 12 inches long and 3 inches wide logs

lightly brush with egg mixture on top and sides

bake until golden brown and slightly cracked on top for 20-25 mins

transfer baking sheet on cooling rack and let it cool completely,about 15 mins

diagonally cut 3/4 inch thick slices with a serrated knife

lower oven temperature to 300 F

bake both side about 7 mins until lightly golden and crisp on each side

serve warm and enjoy with a cup of coffee!!

orange and date bread

Assalamo alaikum,

As you guys know that i love baking and when ever I’m visiting somebody i feel that its always better to bring something homemade it shows your love and care for other person .whenever i have enough time, i try to make my favorite cake by the way i have made this cake so many times i know the recipe by heart and love to play around with it but this time when i was visiting my aunt i was like i need to make something different so went ahead and started searching for a different recipe in which  available ingredients can be used,i found this loaf cake recipe, kind of healthy it has orange juice and dates so here we go , i hope you will enjoy making this recipe as i did and it tasted good too”aunt approved”lol !!

source:allrecipe.com

1 egg
2 tbsp softened butter
3/4 cup pure cane sugar
3 tbsp orange zest
1 cup fresh orange juice
1 tsp vanilla extract
2 cup flour
1 tsp baking powder
1 tsp baking soda
3/4 tsp salt
i cup dates pitted and chopped

direction:
pre heat oven at 350 degrees

grease a 9x5x3 inch loaf pan

beat eggs  add butter and sugar beat until smooth

zest oranges to get 3 tbsp zest

mix dry ingredient flour, baking powder,baking soda, salt and then add chopped dates

add vanilla extract and  zest to egg mixture and then orange juice

now add dry mixture to liquid mix to moisten

bake for 1 hr in 350 degree oven or  fork inserted in the middle comes out clean

cool completely then take of pan

enjoy a slice with coffee or tea !!

NOVEMBER 2014 DARING BAKERS’ CHALLENGE -MINI PARIS-BREST

Assalamo alaikum,

Being part of the Daring Baker is so much fun every month there something new to bake and its get more exciting as you are baking specialties from other countries how fun !!!
The November Daring Baker’s challenge took us on a ride!Luisa from Rise of the SourdoughPreacher challenged us to make Paris-Brest,a beautiful pastry celebrating the Paris-Brest bicycle race.

this recipe is basically a Choux Pastry which is not new to me as it is also base of Eclairs Alhamdulilah made a lot of them but sadly never posted here ,it was before my blogging journey began.lots of lesson learned while making this pastry you have to pipe it with a piping bag as i have none i used Ziploc bags which ripped on me so better get a piping bag lady!!
Surely head to the Daring Baker here as you can view the original recipe as with the filling i went simple using whipping cream but would love to use the original cream that is Praline cream, must be really delicious, in sha Allah (if Allah wills) next time !!

PARIS-BREST

ingredients:

flour 1 cup
sugar 2 tsp
salt 1/2 tsp
water 1 cup
butter 10 tbsp
eggs 4 lightly beaten
Pistachio sliced 1/3 cup

filling:
sweetened whipped cream

direction

heat oven at 400F and line a baking tray with foil

mix together dry ingredients that is flour, sugar and salt

bring to boil water and butter

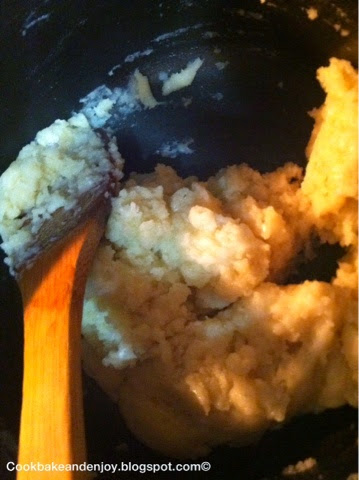
remove from  heat and add flour mix  with a wooden until all comes together

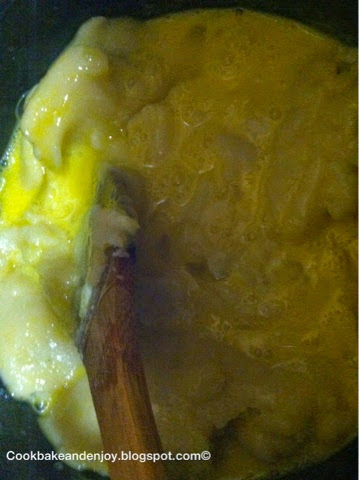
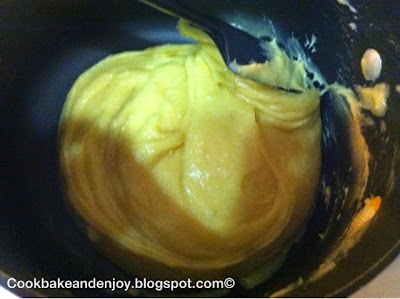
after cooling slightly the eggs mix , it will look messy but keep on mixing until forms a sticky paste, if you leave it for a while after mixing it will be much easier to handle as it will become more until

place a ziplock bag in a cup and then fill it with the dough,snip a corner

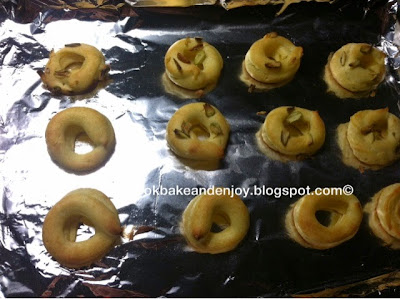
using a small biscuit cutter to mark on foil lined baking tray and pipe dough forming circle

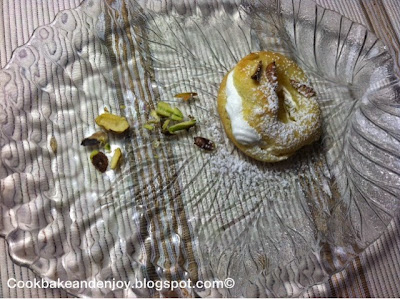
sprinkle sliced pistachioes

bake for 15 mins and please dont peep it will deflate the pastry

after 15 mins open your oven slightly,poke small hole in the pastry to let steam out and let it cool for 10 mins

take it out of oven cool completely and slice it half

fill it with cream and dust with powdered sugar and enjoy!!

 .

White Chocolate Lime Cupcake or Cake Recipe

Assalamo-alaikum,
I’m back with my weekly post this time I’m trying to be punctual .I’m hoping my readers are enjoying and trying out my recipes I don’t claim I’m best just trying to share my cooking adventures with you guys feedback would be really appreciated.
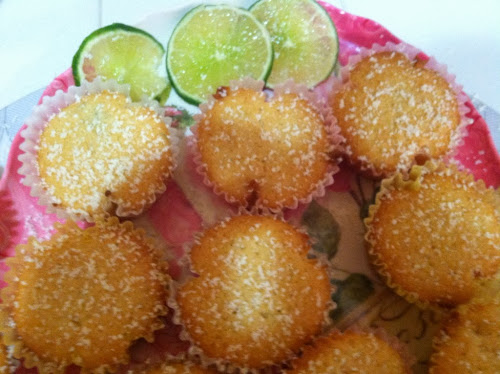
It’s been long time I posted some baking recipe so today I’m sharing a recipe the will surely please your tastes buds and also your nose as the smell of lime fills your kitchen.Today I’m making cupcakes as I will be giving these to my kids for their school lunch ,but I have also made it in loaf pan it came out really good as well but you have to bake it more around like 35-40 mins ,make sure you line your pan with wax paper so taking out would be easy.
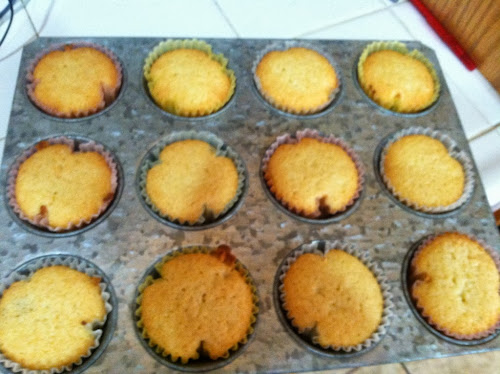
These cupcake are crunchy on top and moist inside and taste so very good , I specially like that they are not very sweet so go ahead and make some !!

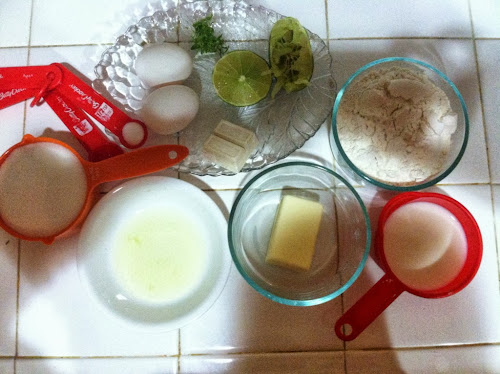
ingredients:

Cupcakes/Cake:
1-3/4 cups all-purpose flour
2 teaspoons baking powder
1/2 teaspoon salt
6 Tablespoons butter, softened
1 cup sugar
2 large eggs, lightly beaten
1 teaspoons grated lime zest
1 Tablespoon fresh lime juice
3/4 cup buttermilk
1oz white baking chocolate shredded -extra for topping the cupcake with

P.S: this recipe ask for buttermilk but you can always substitute it with the same amount of milk only one tbsp less and add tbsp vinegar to the milk let it stand for 5 mins and you will have buttermilk!!

Directions:
Heat oven at 350 degrees F (175 degrees C).line your cupcake tin with liners
Mix flour,salt and baking powder
Cream butter and sugar with electric beater

Add eggs ,lime zest and lime juice and mix well

Now alternatively add 1/3 flour and little buttermilk at a time until all the flour and buttermilk completely combined with butter and sugar mixture

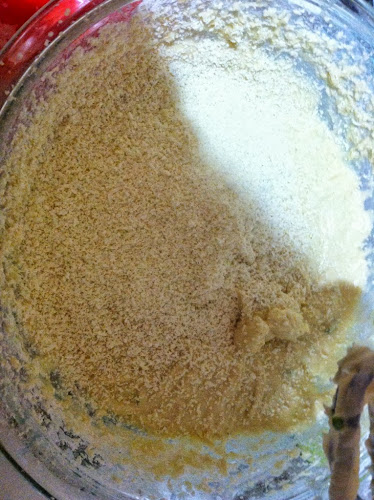
Fold in grated baking white chocolate ( I grated it with my grater at the same time)

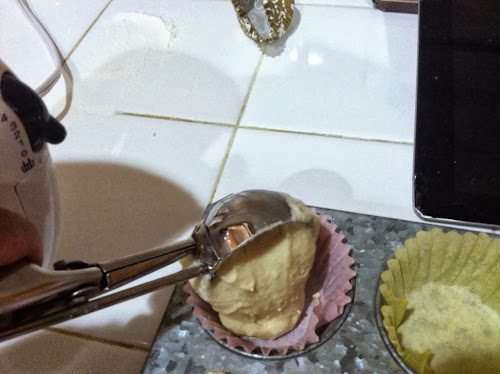
Now with the scoop fill 2/3 of the cupcake liners and bake for 18 – 20 mins or until wooden pick inserted comes out clean .

Sprinkle shredded white chocolate on top of the hot cupcakes and enjoy !!!

Kairi ka sharbat (green mango drink)


Assalamo alaikum,

Summer is here which brings us lots of fun, delicious fruits too specially mango .It is known to be king of fruits and why not it is super yummy umm… now my mouth is watering ,growing up in Pakistan we had the luxury to have such an amazing and delicious mangoes my favourite in Sindhri !!! Before I get carried away with my mango stories let me get back to my post ,we desi’s know that there is another aspect of mangoes that we admire ,when it is still raw not ripened yet it is super sour and used it in various pickles and chutneys .

Allah has lots of medicinal benefits in raw mangoes ,it protects us from the scorching heat so it’s very common in subcontinent to make kairi ka Sharbat or Aam Panna (as it’s called in India ) .it was a must when kairi or raw mangoes were available to make kairi ka Sharbat to beat the heat ,my mom use to make a big batch and we use to enjoy it all summer long !!!because green mango or kairi is available for certain period of time.

The tradition still goes on in my home in Southern California ,so when I saw raw Mango at my local Indian store I was already planing for kairi ka Sharbat and chutney (recipe coming soon)!!

Kairi ka Sharbat:

Recipe :

2-3 Medium size kairi or raw mango

Sugar 2 cups or as needed

Water

Lemon juice (optional)


Direction:

Cook covered, unpeeled and washed raw mangoes on tawa or griddle until they soft to touch


Set the mangoes aside and let it cool

Now it’s time to get messy ,peel the mangoes and squeeze out the pulp

Now cook this pulp with sugar until sugar is fully In cooperated

Now let this mixture cool and blend it in a blender at this point cooled mixture can frozen for upto three months or kept in refrigerator for 2-4 weeks

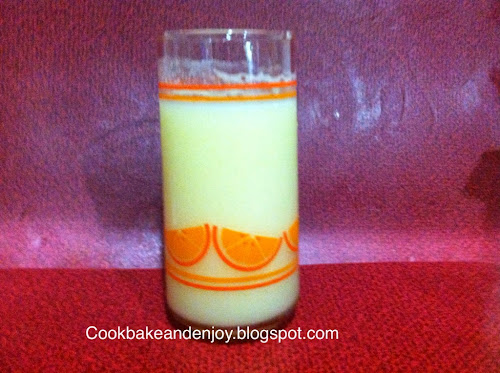
To make a glass of Sherbet ,pour 2-3 tbsp of this pulpy mixture in a glass, then add ice ,water and sugar if needed and mix well or blend it in blender for frothy Icy drink yumm!! At this point splash of lemon juice could be added for little sour twist 🙂

We are enjoying Refreshing Kairi ka Sharbat at Iftar time during Ramadan ,I hope you all will enjoy it too!!!